How To Run Python Script On GCP Batch
Sep 16, 2022
Recently, Google announced a completely new service as part of their Google Cloud offering, called Batch.
What is GCP Batch?
From Google docs: “…Batch lets you create and run jobs that are based on a script by utilizing the resources required to execute its tasks.” The service is perfect for heavy tasks as it offers up to 224 CPUs and 896 GB of memory.
Motivation for using Batch
Google Cloud offers a range of services that take away server management and do everything for you. These types of services are offered with the “serverless” label put on them and among others, including Cloud Functions.
Cloud Functions are the perfect candidate for event-driven architectures. Take this example: you upload a file to the “unprocessed” storage bucket – this sends a notification to a Pub/Sub topic you’ve configured, which then triggers the Cloud Function. The Cloud Function then processes the uploaded file and uploads it to the “processed” storage bucket. This level of simplicity, combined with the 1-hour timeout, 32 GB of memory and 8 CPUs that 2nd generation Cloud Function offers, makes them the go-to choice when handling scenarios like this one.
Months pass by and files are uploaded and processed just fine, then out of nowhere, you receive an alert that the Cloud Function failed. Suddenly the “honeymoon” phase of using the new service is gone. You start troubleshooting what went wrong and see that the uploaded file is a few GB in size with several million entries. The size of the file, together with the complex processing that the Cloud Function does, causes the Cloud Function to hit the 1-hour timeout.
Luckily, the new Batch service has no timeout, meaning it will run your script until it returns a result. Batch accepts two types of deployments: a bash script or a Docker image. We need to migrate our Python Cloud Function inside Batch, so we’ll need a Docker image that will contain our Python code.
Building the Docker image
Let’s start with creating a “batch” folder which will contain our code and Dockerfile. Navigate to the folder and create a Python virtual environment running:
python3 -m venv env
and then activate the virtual environment:
source env/bin/activate
Now we’re ready to start working on our code. For the simplicity of this tutorial, we’ll create the simplest possible example of a Python script — we’ll print “Hello from Batch”. So, our main.py will look like this:
print(“Hello from Batch”)
We need to tell the Docker image what requirements it needs in order to run the main.py script, so let’s create a requirements file by running:
pip freeze > requirements.txt
Finally, we can write the Dockerfile:
FROM python:3.8


WORKDIR /script

COPY requirements.txt .

RUN pip install -r requirements.txt

COPY main.py .

ENTRYPOINT \[ "python3", "main.py"\]
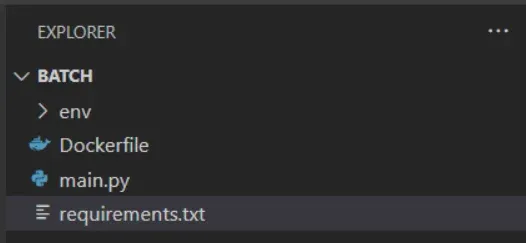
As you can see, this is a really simple Dockerfile that pulls the python3.8 image, installs the needed requirements for the script, and finally executes the script. This is the structure of our little project:
We’re now ready to build the Docker image. Our goal is to upload the built Docker image to GCP Artifact Registry as from there we can easily use it for our Batch job. If you haven’t already, create a repository for storing the Docker images. We’ll name it “batch-tutorial”.
To be able to publish the image to Artifact Registry, the image needs to be tagged in a specific format which GCP expects:
LOCATION-docker.pkg.dev/PROJECT/REPOSITORY/IMAGE:TAG
where
- LOCATION is the regional or multi-regional location of the repository.
- PROJECT is your Google Cloud project ID.
- REPOSITORY is the name of the repository where the image is stored.
- IMAGE is the name of the image in the repository.
- TAG is the tag for the version you want to delete.
So, we build our Docker image by running:
docker build -t europe-west3-docker.pkg.dev/PROJECT/batch-tutorial/batch:tutorial .
Publishing the Docker image
Having successfully built the Docker image with the specific tag, we’re now ready to publish the Docker image to Artifact Registry. Please make sure to be authenticated with GCP and with the Docker registry before trying to publish the image which is done by running:
docker push europe-west3-docker.pkg.dev/PROJECT/batch-tutorial/batch:tutorial
Publishing the Docker image means that we have everything ready to create our Batch job, so let’s go ahead and do that.
Create Batch job
The last piece in the puzzle is to create the Batch job. Navigate to https://console.cloud.google.com/batch and click on Create which is at the top of the screen. This will open a new screen for creating the Batch job. Note that there is a limited number of regions you can choose from as the Batch service is still in preview mode. For the container image URL paste the URL of the Docker image you pushed in the previous step and at the bottom choose how many resources you want to allocate for the batch job and click on Create. Now, GCP needs to allocate the needed resources that you asked for, so at first, the job will have the queued status. Once the resources are allocated, the status will change to “scheduled”. Finally, the Batch job starts executing the Python script and the status changes to running.
Once the Batch job has succeeded (or failed) we can open it in detail view and click on Cloud Logging. In our case, we can see that the batch job printed “Hello from Batch”. Hooray!
Okay, this all sounds good for a simple “Hello World” example, but we talked about Batch jobs as being alternatives to event-driven Cloud Functions. We can’t create event-driven Batch jobs as straightforward as the Cloud Functions — instead, we have to use GCP Workflows.
Event-driven Batch job with GCP Workflows
Let’s again imagine a scenario: you upload files to your “unprocessed” storage bucket and the file gets processed and saved. The difference from the previous scenario is that now the file gets processed with a Batch job.
To download a file from GCP storage, we first need to install the necessary package:
pip install google-cloud-storage
Now, let’s write the Python code:
from google.cloud import storage
from loguru import logger as log
import os

def download\_file(bucket\_name, source\_blob\_name, destination\_file\_name):
\# The ID of GCS bucket
bucket\_name = os.environ.get(“BUCKET”)
\# The ID of GCS object
source\_blob\_name = os.environ.get(“FILE”)
\# The path to which the file should be downloaded
destination\_file\_name = “batch-tutorial.txt”
storage\_client = storage.Client()
bucket = storage\_client.bucket(bucket\_name)
blob = bucket.blob(source\_blob\_name)
blob.download\_to\_filename(destination\_file\_name)
log.info(f”Downloaded storage object ‘{source\_blob\_name}’ from bucket ‘{bucket\_name}’ to local file ‘{destination\_file\_name}’”)

if \_\_name\_\_ \== “\_\_main\_\_”:
    download\_file(bucket\_name\=””, source\_blob\_name\=””, destination\_file\_name\=””)
You may notice that we’re using two environment variables – bucket name and source file. These are still not defined anywhere, but we’ll be defining them in the next steps inside the Workflow.
Now, let’s run:
pip freeze > requirements.txt
so our requirements are up to date.
The contents of the Dockerfile are exactly the same as for our previous “Hello from Batch” example.
Now, let’s build and push the Docker image. We’re using the same commands as before and are only changing the image tag:
docker build -t europe-west3-docker.pkg.dev/PROJECT/batch-tutorial/batch:event-driven-tutorial .
docker push europe-west3-docker.pkg.dev/PROJECT/batch-tutorial/batch:event-driven-tutorial
With the docker image pushed to Artifact Registry, we’re ready to start working on the Workflow. The workflow will get triggered on every upload to the ‘unprocessed’ bucket and it will receive an event from the bucket telling it what file was uploaded.
First things first, go to GCP Workflows and click on Create. This opens a new screen where we need to set a name for the Workflow, choose a region and a service account and optionally configure a trigger. Make sure that the service account you choose has enough permissions to call the Batch API.
As we want to execute the Workflow on every “file upload” to a bucket, we click on Add new trigger and choose Eventarc. Here we decide on Cloud Storage as Event Provider, browse and choose our “unprocessed” bucket and choose google.cloud.storage.object.v1.finalized as the trigger event.
We’re now ready to define the Workflow which will look like this:
main:
params: [event]
steps:
- init:
assign:
- projectId: ${sys.get_env("GOOGLE_CLOUD_PROJECT_ID")}
- region: "europe-north1"
- batchApi: "batch.googleapis.com/v1"
- batchApiUrl: ${"https://" + batchApi + "/projects/" + projectId + "/locations/" + region + "/jobs"}
- imageUri: "europe-west3-docker.pkg.dev/PROJECT/batch-tutorial/batch:event-driven-tutorial"
- jobId: ${"job-" + string(int(sys.now()))}
- log_event:
call: sys.log
args:
text: ${event}
severity: INFO
- extract_bucket_and_file:
assign:
- bucket: ${event.data.bucket}
- file: ${event.data.name}
- logCreateBatchJob
call: sys.log
args:
data: ${"Creating and running the batch job " + jobId}
- createAndRunBatchJob:
call: http.post
args:
url: ${batchApiUrl}
query:
job_id: ${jobId}
headers:
Content-Type: application/json
auth:
type: OAuth2
body:
taskGroups:
taskSpec:
computeResource:
cpuMilli: 4000
memoryMib: 32000
runnables:
- container:
imageUri: ${imageUri}
environment:
variables:
BUCKET: ${bucket}
FILE: ${file}
taskCount: 1
parallelism: 1
logsPolicy:
destination: CLOUD_LOGGING
result: createAndRunBatchJobResponse
At the start of the workflow definition, we set the params keyword to consume the event that is sent from the workflow trigger (the file upload) which we’ll use to get the bucket and the filename (the ones we use as environment variables inside our main.py file).
Next, in our init step we get the GCP project ID, we set the region that the batch job will deploy into along with the Batch API, the Batch API URL, the URI of the Docker image we build and push to Artifact Registry and the Batch job Id.
Inside the extract_bucket_and_file step, from the received event we extract the bucket name and the file name. Completing this, we’re now ready to define the Batch job.
We start the definition for the batch job by sending a POST request to the Batch API URL we defined in the init step. Defining the compute resources for the job is next — in our case, we request 4 CPUs and 32 GB of memory. Finally, we have to tell the Batch job what container to run and we do that by providing the imageUri we defined in the init step. We set the bucket and the file name we extracted from the event as environment variables to the image which we then use inside the main.py file. With this, the workflow is ready.
Finally, we come to a stage where we can test the implementation. If everything works as expected, we should upload a file to the “unprocessed” bucket which then executes the Workflow and the Workflow will then create a new Batch job. The Batch job should download the uploaded file.
Navigate to your “unprocessed” bucket on GCP and upload a file of your choice. Next, go to the Workflow dashboard and check if the Workflow got executed. If you did everything right it should have the Success status.
The next step is navigating to our Batch job dashboard. Here we can see that our Batch job is created. After a few minutes, the Batch job will start running and will pretty fast enter the succeeded state (as our Python script is really simple).
Now we can open the logs for the Batch job and see that the Batch job downloaded the file we uploaded to the “unprocessed” storage bucket. Awesome!
And what is more awesome is that we currently have several job openings at Intertec.io. If you want to be a part of an environment that inspires you to learn, grow and lead by example, make sure to check them out!

Viktor Nanevski